Polar viewfinder lighting
3D design, print and assemble an extension light for a polar viewfinder
This blog-post is about astro photography!
To capture sharp images of the night sky you either need to use a short exposure time or better, track the movement of the stars.
If you don’t do that, you’ll get star trails and no sharp points. Furthermore, it is not possible to gather more light from a specific location in order to photograph the Milky Way or certain galaxies.
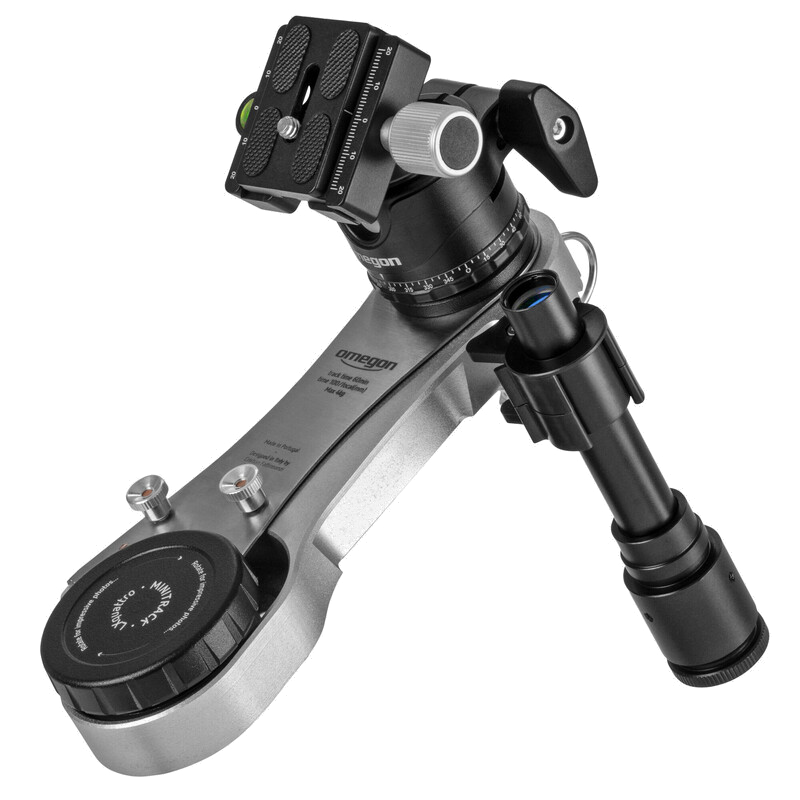
Therefore, I got myself an astro tracker that follows the star movement when you align it with the Pole Star:
Actually a simple principle. Using a finder scope, the tracker is aligned with the Pole Star along with the camera and then set in motion. My model (Omegon LX4) is purely mechanical and turns constantly using spring tension, just like there are battery-powered models as well.
With my specific model there occured a few problems on my first attempt:
- It was really cold outside 🥶🥶
- To look through the viewfinder, you have to take on an extremely uncomfortable posture
- You can’t see the aiming cross in the finder due to the darkness of the surroundings
Since problems are there to be solved, let’s get started!
Solving my problem
I’ll fight the first one with warm drinks and extra clothes, I’ll count that as solved.
I’ll tackle the second one later, perhaps with a mirror or something similar.
The third problem is the subject of this blog, stay tuned..
So there is this device:
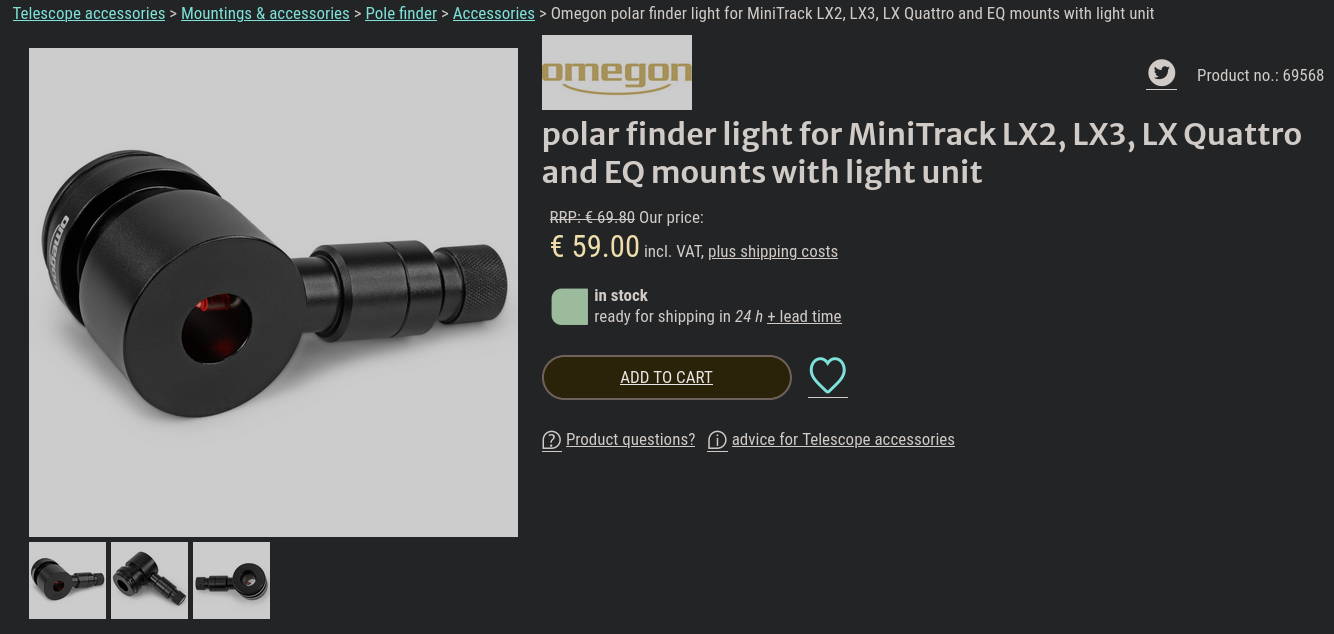
The site describes the device as follows:
Polarscope illumination - a small tool with a big effect
The polarscope illumination greatly simplifies the alignment of the parallactic (equatorial) mount with a polarscope so that you can quickly orientate yourself and begin observing sooner.
The highlights at a glance:
- Quick and accurate alignment thanks to LED light, making it easy to use the polarscope at night
- Continuously adjustable brightness
- Fits a variety of mounts: MiniTrack LX 2, LX3, LX Quattro and EQ
The red battery-powered LED light illuminates the telescope, making the engraved guide lines and scales visible, which are otherwise difficult to see at night. You can now conveniently and accurately align your telescope with the Pole Star. Accurate alignment is particularly advantageous for astrophotography.
The light simply attaches to the front of the polarscope and fits MiniTrack LX2, LX3, LX Quattro and EQ mounts. The brightness of the lighting is continuously adjustable.
This sounds great and should solve the problem, but its way to expensive for me! 60€ for a simple LED, some metal and a conventional button cell, I can do that too.
FreeCAD!
So I started Freecad and began with the design.
I measured my polar star finder and used the values to create the technical drawings in the Freecad Part Design and Sketch workbench. I want to split the attachment into several parts to make it easier to print and improve.
I also looked for a suitable red LED in my boxes whose values matched the button cell I still had in stock. Once these had been determined and tested, I tinkered with a holder for the battery. It should be easy to replace and the construction should work without a switch for the time being. It must be possible to establish a reliable connection to the LED. I also installed a small resistor in the circuit.
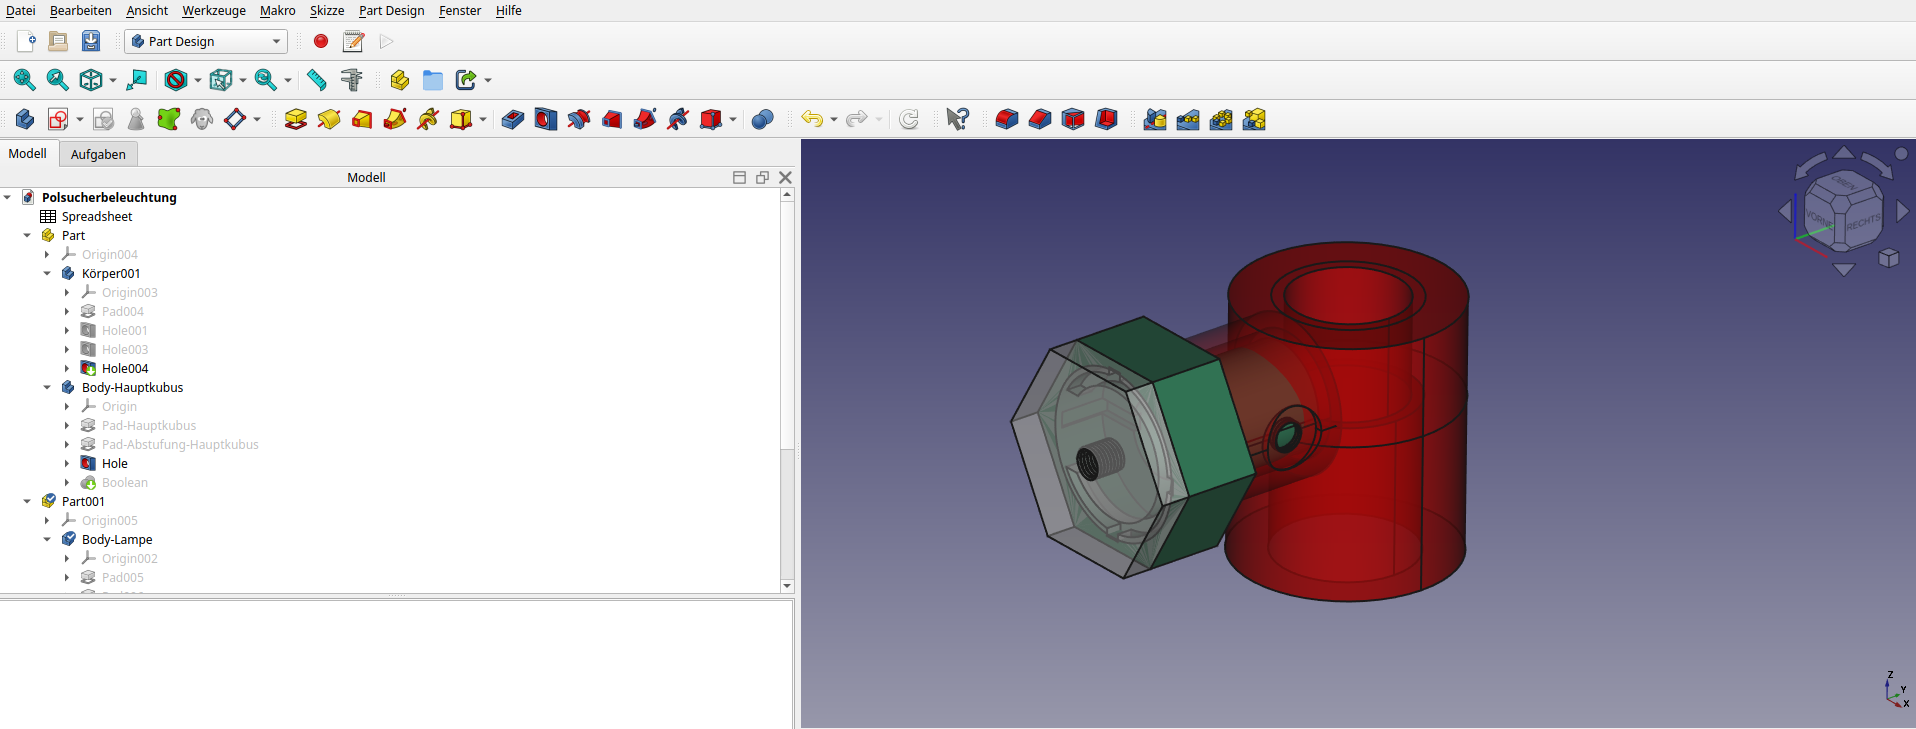
The final Freecad Design looks like this:
3D Print
To print the parts with my 3D printer, I need to “convert”/slice the models into G-Code. G-Code is a language to instruct the printer on how to drive.
It is like this:
G1 X146.918 Y88.281
;TYPE:External perimeter
G1 F2540
G1 X147.8 Y86.926 E10.68586
G1 X148.944 Y85.582 E10.7456
G1 X150.251 Y84.395 E10.80536
G1 X151.16 Y83.755 E10.84299
G1 X151.782 Y83.346 E10.86819
G1 X152.404 Y82.984 E10.89255
G1 X152.453 Y82.856 E10.89719
G1 X152.453 Y71.39 E11.2853
G1 X155.835 Y71.39 E11.39978
G1 X155.835 Y81.482 E11.74138
G1 X155.889 Y81.558 E11.74454
G1 X155.848 Y84.202 E11.83405
G1 X155.882 Y85.691 E11.88446
G1 X155.948 Y85.836 E11.88985
G1 X156.086 Y85.89 E11.89487
G1 X161.574 Y85.89 E12.08063
G1 X161.712 Y85.836 E12.08565
G1 X161.778 Y85.687 E12.09117
I use PrusaSlicer to slice it:
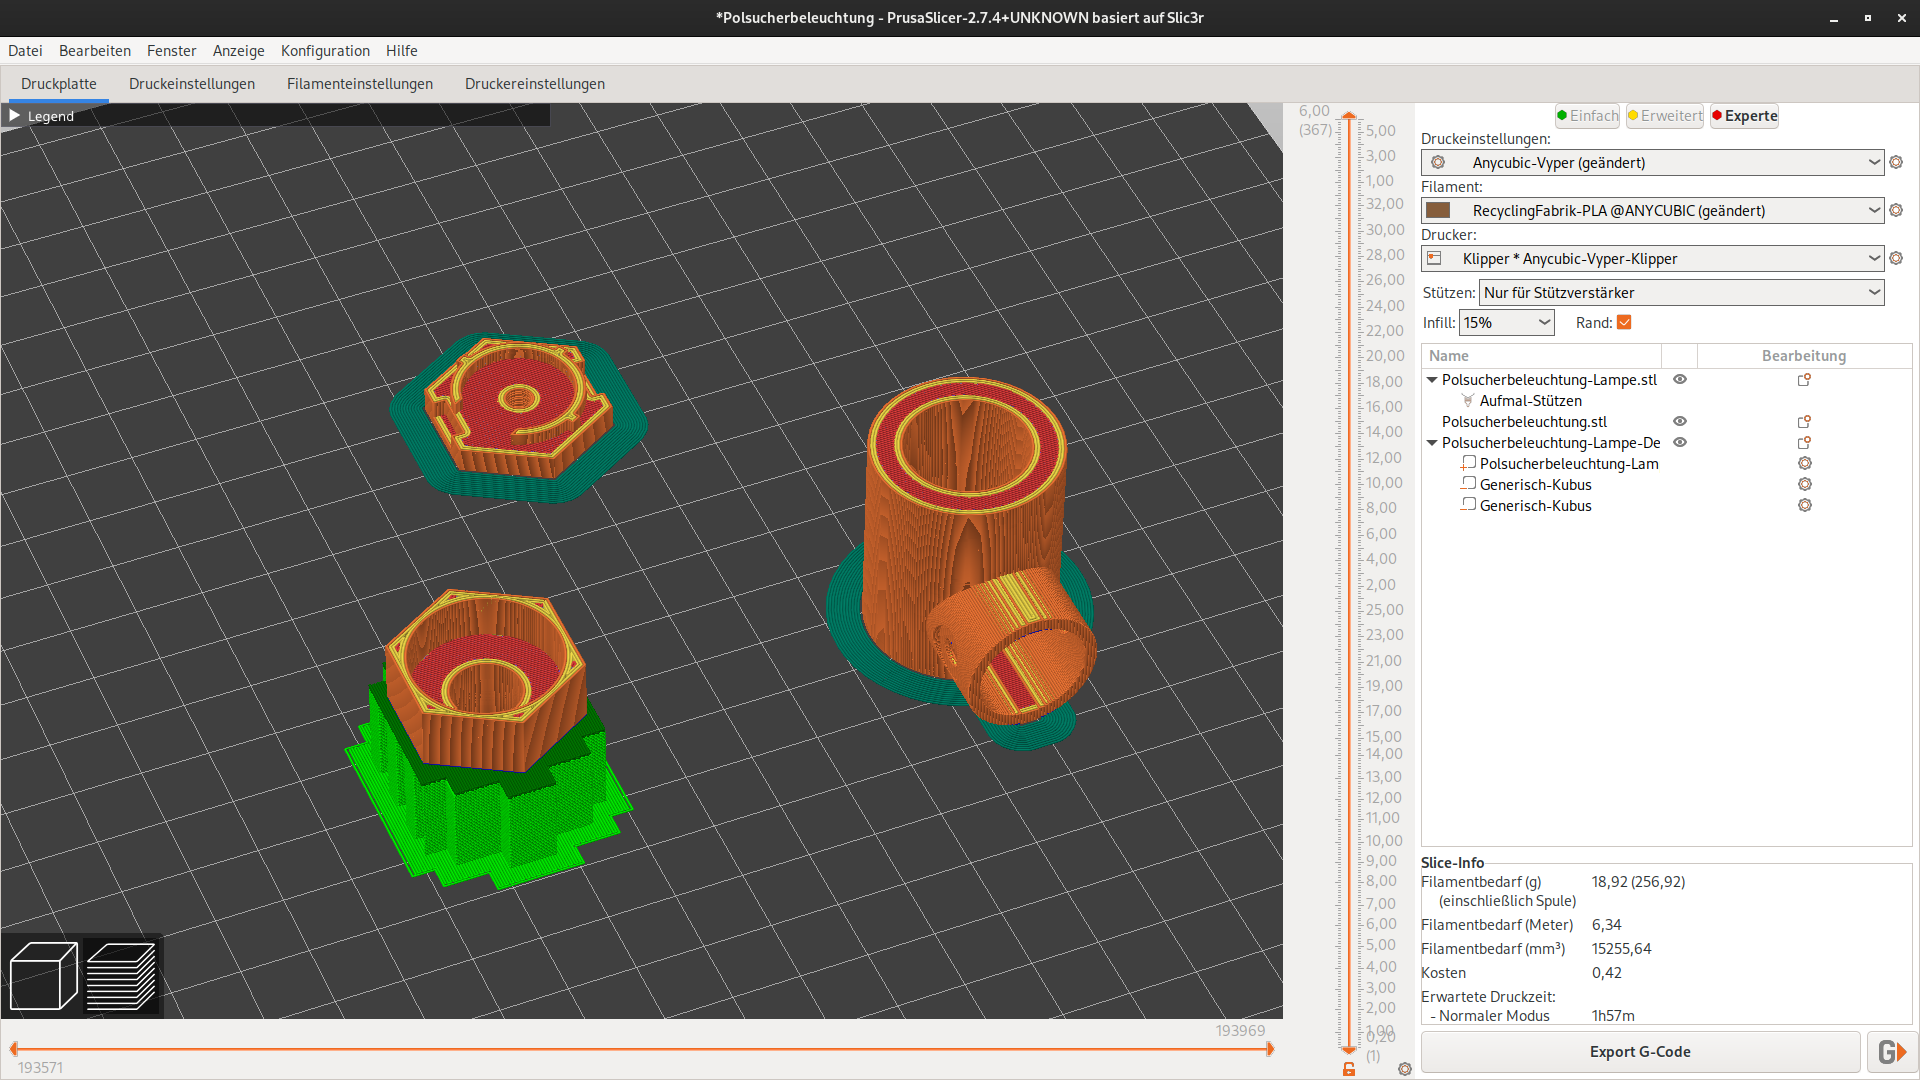
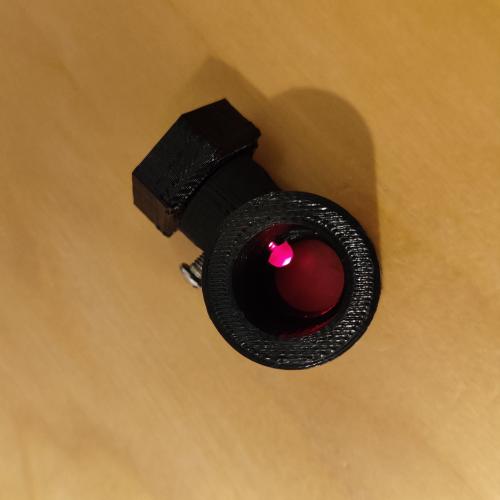
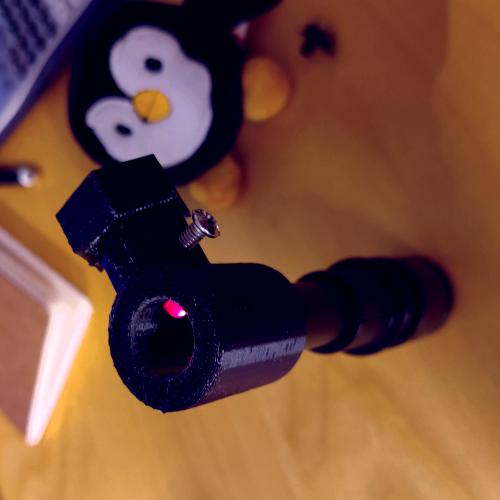
After a few iterations I got my final design and print! Now we have to wait until the next night-time test is possible.
Little update on 11th June 2024
At the weekend I carried out the first real test of the lighting outside.
It worked well, both the stars and the target cross were clearly visible. It’s much better this way!
There are a few minor improvements to be made:
- The battery cover doesn’t hold well
- An on/off switch would be nice
The setup looks like this:
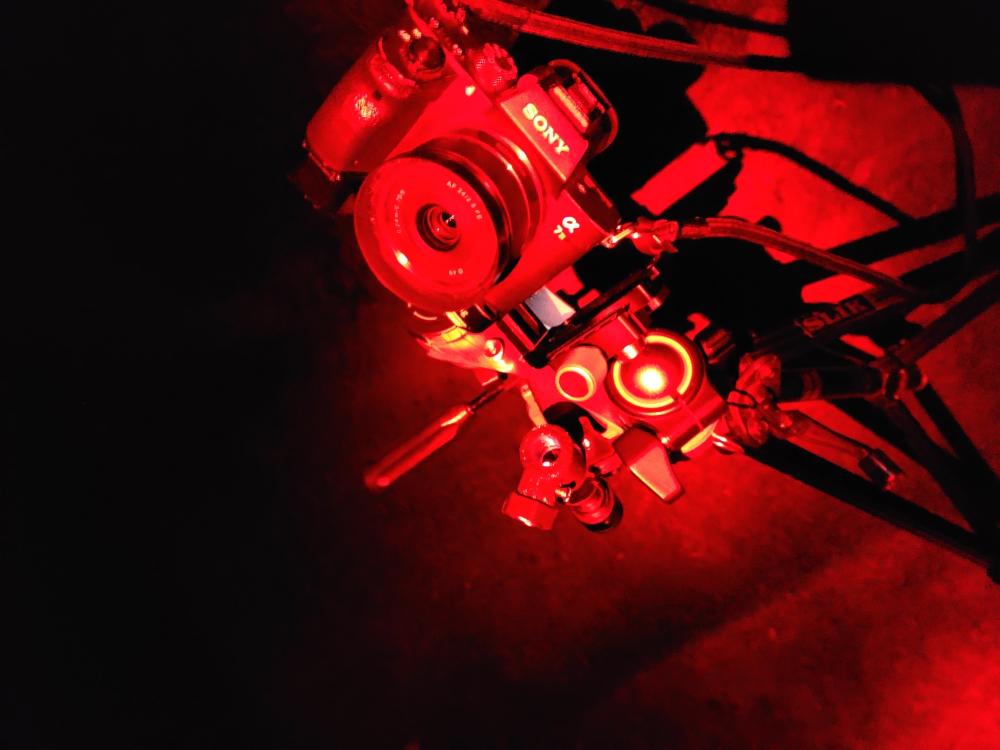
I illuminated the setup with my bicycle rear light so that you can see something and my eyes don’t have to adjust so much between the lighting and the dark night.